Organize your Pickleball Club or Group for FREE today!
Spend less time managing and more time playing with PicklePlay’s FREE club management software. Most club management tools are just business tools that have been retrofitted to work for Pickleball, but not this one. Our software was built with Club Managers specifically in mind.
PicklePlay features - all in one place, and at the tips of your fingertips!
- Organize Your Play Schedule
- Easily Collect Dues
- Create And Monitor Events
- Sync Them With Your Calendar
- Send Reminders
- Communicate With Members In Real Time
- Club communication feed
You can push everything straight to the PicklePlay app. Staying organized and communicating as a club manager has never been easier! Best of all, you can do it for FREE! In this blog, we’ll guide you through the simple steps to create your own pickleball club or group.
How to create a Club or Private Group:
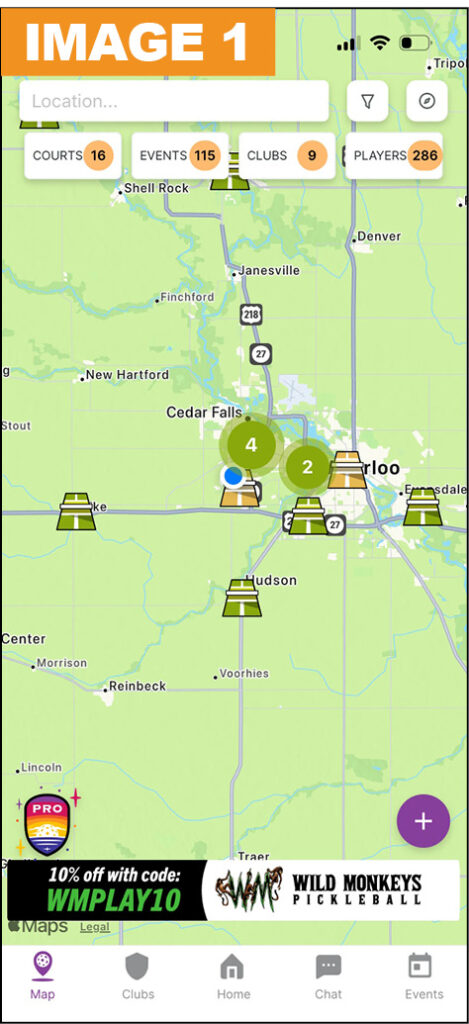
First, make sure that your court is added as a location on our map screen. If its not, you can add it. Click on the purple plus icon in the bottom right corner of the map screen. See Image 1.
Once your court is added to the map, click on the clubs icon at the bottom of the map. Similarly to the map screen, there will be a purple plus icon in the bottom right corner of the screen. When chosen, it will prompt you to create a Club or a Private Group. See Image 2.
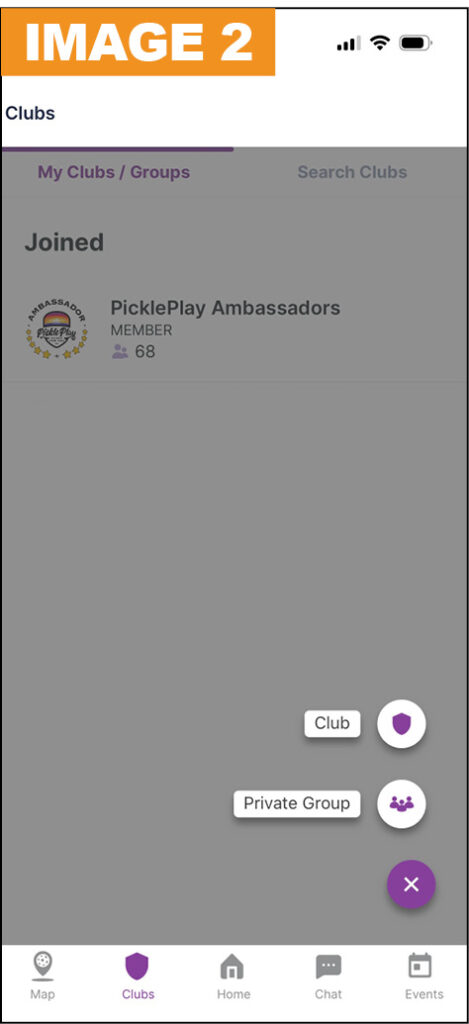
In a Club, members will still have to request or be given a link to join, but it will be searchable by all PicklePlay users from the map screen, whereas a Private Group is not searchable.
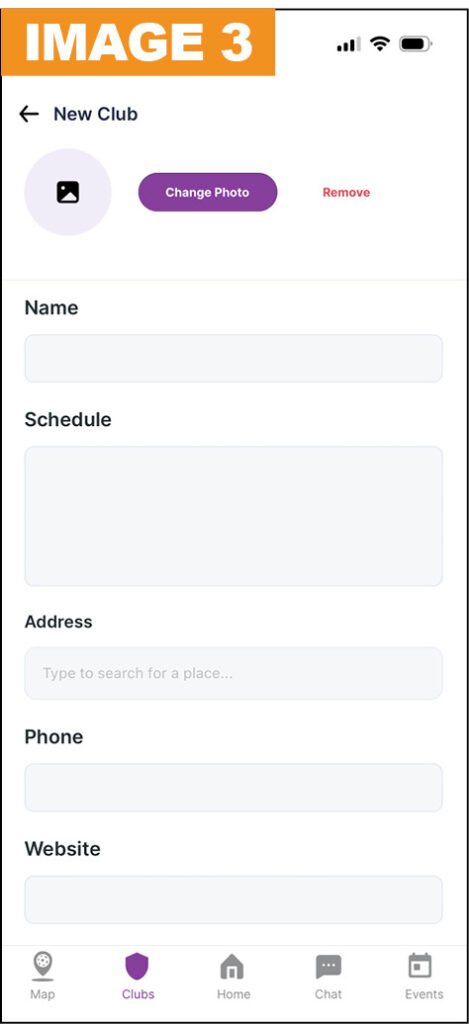
After selecting either Club or Private Group, you will be prompted to fill in all of the information about your Club or Private Group. You don’t need to worry about adding your members at this time. Just fill in the appropriate information to set up. See image 3.
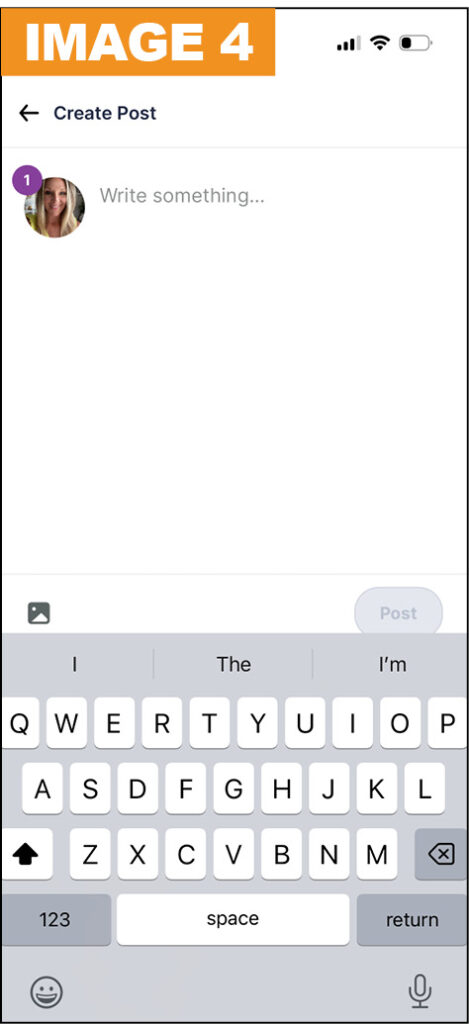
Once the Club or Private Group is created, we first suggest that you create a welcome post on the Feed tab. That will be the first thing members will see when they join. See image 4.
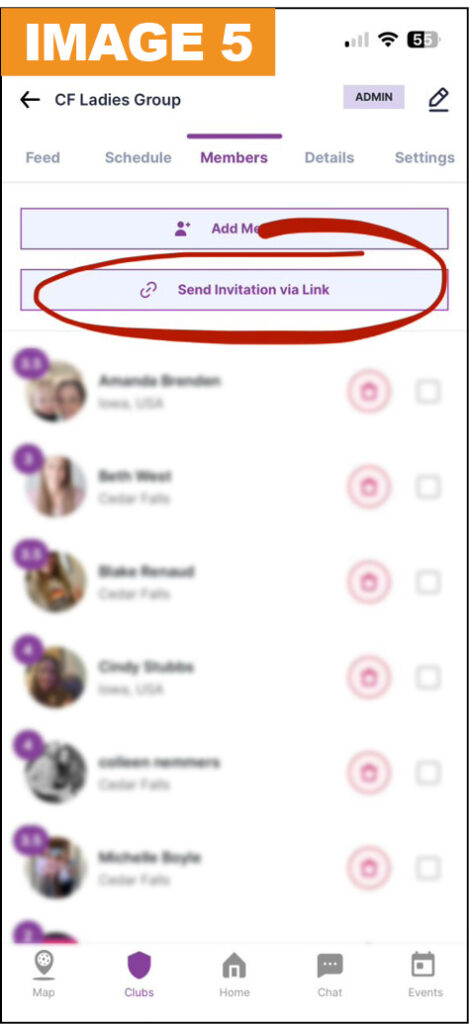
Now that your club is created, it’s time to add your members! To do this, go to the “Members” tab and click on “Send invitation via link.” There, you can copy the join link to share with your members. See image 5. We recommend that you test this with a small group of individuals before sending the link to the whole group.
If you would rather upload a full member list with a CSV, you can do so in the website club portal. If you wish to add members with this option, we recommend to let us to assist with this process. Please email our team: info@pickleplay.com.
When members receive the link, they will be prompted to download the app and create a profile. Then, they will be automatically added and taken to the Club or Private Group. If they are on a laptop or computer they will be directed to our website portal and will follow the same process.
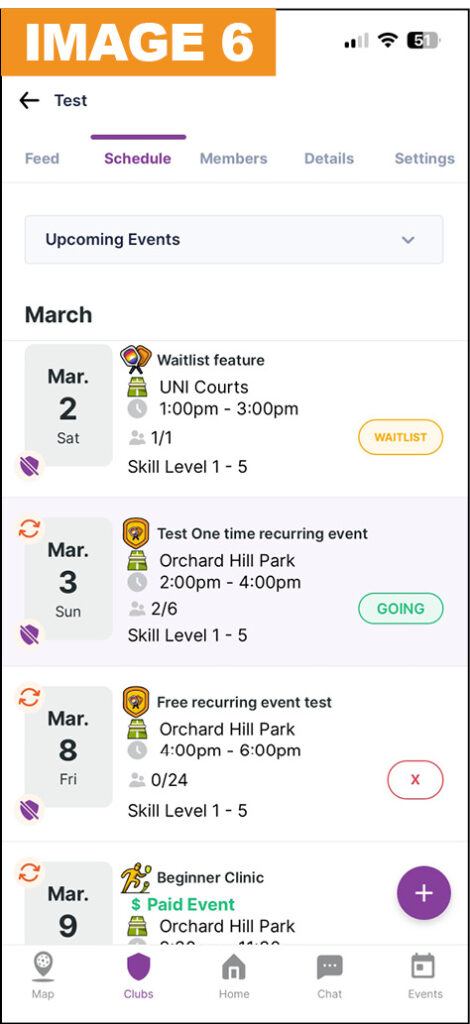
Once your club is created and all members are added, you can start adding events in the Schedule tab. See image 6.
That’s it. You have successfully created a Club or Private Group in the PicklePlay App and can start using it to manage your club or group. So create your group today and spend less time managing and more time playing!
Please let us know if you need any help! Email our team: info@pickleplay.com. Download the PicklePlay app today on IOS or Android or visit pickleplay.com to find courts, events, and tournaments!
